Before beginning with Magento Sitemap it’s important to learn a few general things about the Sitemap itself. So, let’s move with the definition of Sitemap.
From the definition, a sitemap is a plain text XML file.
Generally, it contains a link to all of the contents on our website. For example product description, images, pages, blog post or production description, etc. In a simple word, it introduces your site to the search engines. For example, names like Google, Bing and Yahoo are the search engines where a potential client might look at services or products. So, it helps the search engines to crawl and index the contents of websites into the Search Engines. Simply no sitemaps mean no search result for your services and products. In the earlier version Magento 1x there was an option under Catalog Menu as a sitemap. But in Magento 2x versions the Magento Sitemap also exist but things changes with time.
When we talk about Magento Sitemap, we go through some critical process. Because you have to create a Magento Sitemap and later we need to go through some process which needs basic developer skills. In this article, we’ll show, how to create a Magento Sitemap and connect the site with Google using Web Master Tool.
So, we need to have a great host for our website. Before purchasing any plan for Magento 2x simply check that the hosting provides a cPanel for making development easier. Also, check that you can also access your Root folder using FTP connections. By using third party software like Filezilla etc. For example, our Magento Hosting plans comes with web development support. All you need is to open a ticket or you can directly Chat 24×7 with customer service experts for support regarding Magento sitemap. For a cheap $9.99 per month hosting plan visit our store now!
For Aspiration Hosting Tanzia Farin Chy
Why I do need a Magento Sitemap?
Without any doubt according to the information above, it is clear that you must have a Magento 2x sitemap.
As per Google, they described the following:
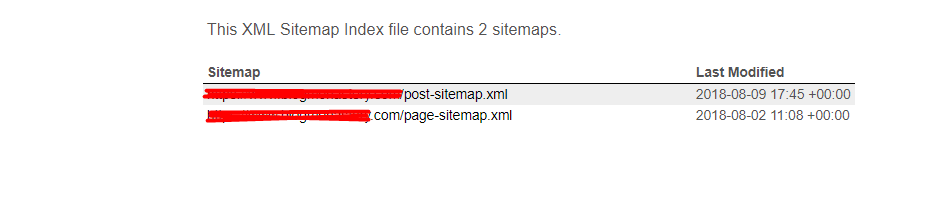
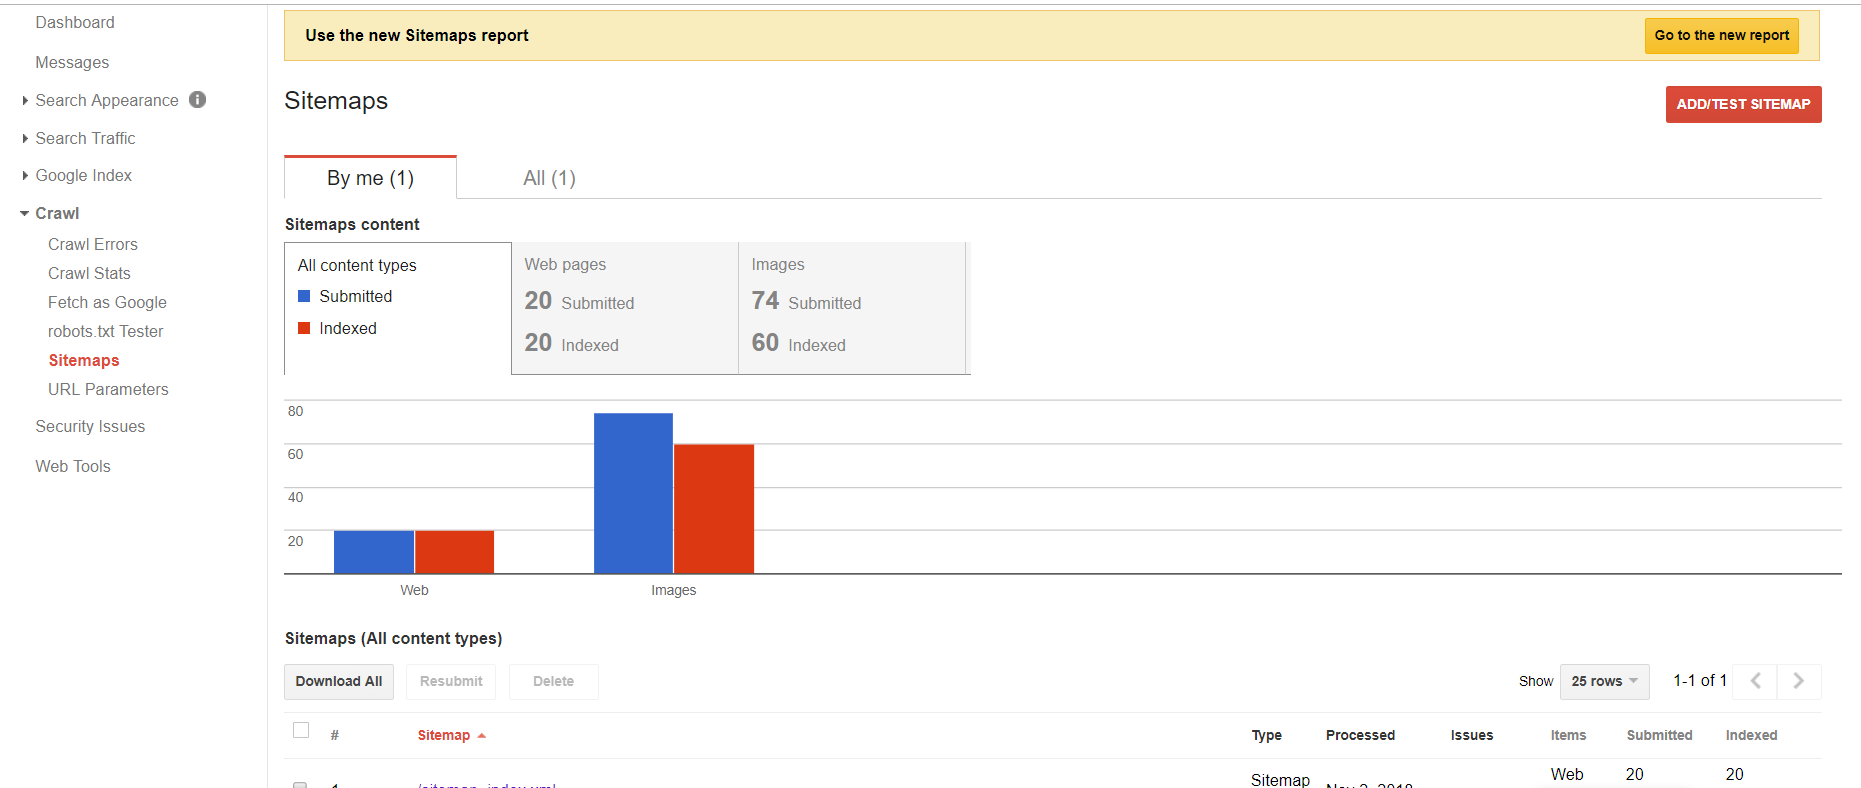
Simply, Sitemap can automate the crawling of our site. Especially in this case of a large site, one with hundreds of content or startup eCommerce or sites with rich media content etc. However, if you’re finding a bit critical to understand the Magento sitemap following image is an example of Google indexing:
Simply remember that SEO is Digital marketing process. It’s like making an announcement of launching a new film on a press conference. So, without having a Magento Sitemaps you virtually exist in the web using a domain. But it has no practical aspect.
Magento Sitemap: A quick 4 steps set-up for your website
- First, the priority of content updates and configure the Frequency settings.
- Secondly, set up the Generation Settings
- Thirdly, Magento Sitemap File Limits configuration.
- Finally, Search Engine submission configuration.
Magento Sitemap: Step 1
- On the dashboard, click Stores. Under the Settings option, select Configuration.
- Next, choose the XML on the left sidebar to find Sitemap under Catalog option.
Now, open the categories option from the dashboard, and follow these following steps:
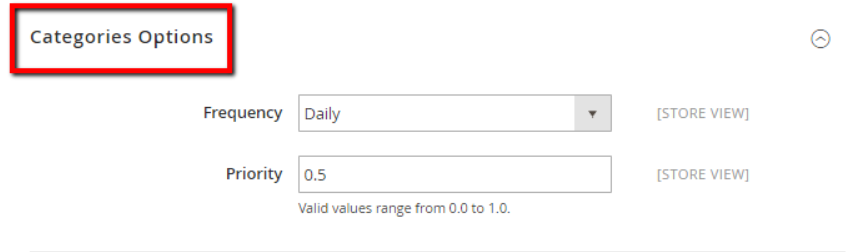
In the Frequency field, select any of the following options:
- Simply choose any of them as per requirement. For example, Always, Hourly, Daily, Weekly, Monthly, Yearly, Never etc. To setup Priority inside the field, enter a value between 0.0 and 1.0. If the priority is the lowest set Zero instead.
Now open the product section to set the values as like the following image:
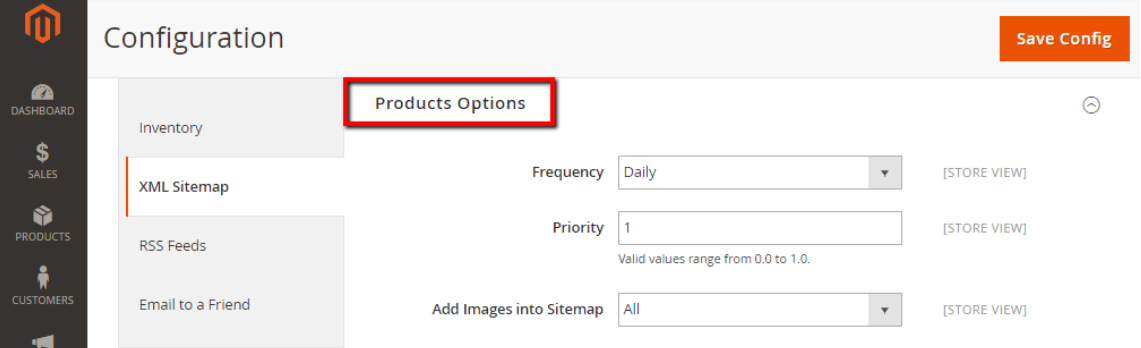
- In the first 2 option field, complete the Frequency and Priority settings as per your requirement. Now for Add images into Sitemap field, select one of the following options: None, Base Only, All. Suddenly, it will be responsible for adding images into the sitemap.
- Next, we will open the CMS Pages Options section. Now complete the Frequency and Priority settings as per requirement. After the processing, all quick setups click Save Config to save the entire setup.
Magento Sitemap: Step 2
- Simply, open the Generation Settings section. Now set the Enabled option field as Yes.
- In the next option field, Start Time, select the hour, minute and second. It’ll regularly update the Sitemap.
- For Frequency option, select one of the following options: weekly, monthly.
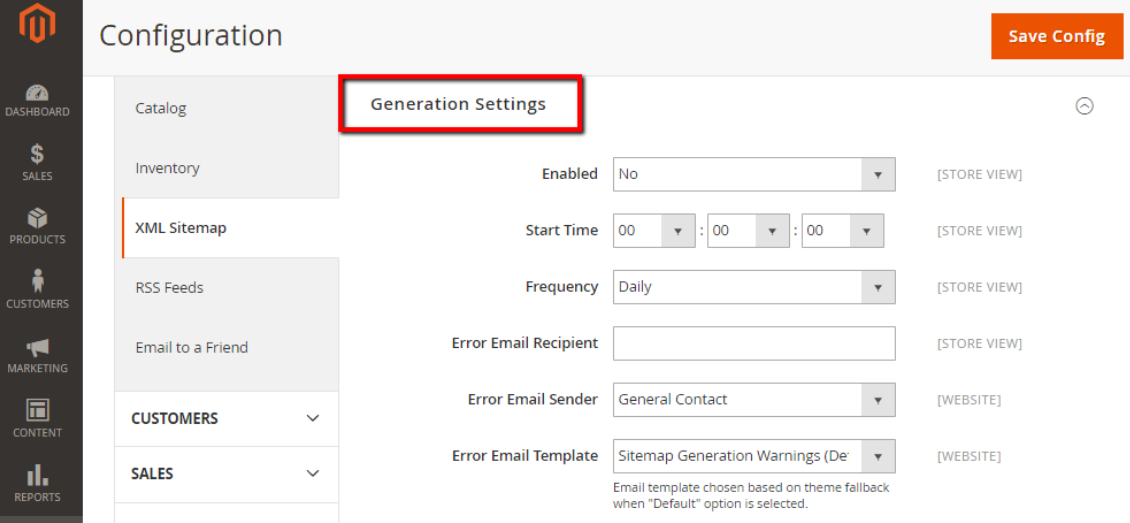
- Next, for the Error Email Recipient option, enter the email address. This will be the person who will be received the notification every time an error occurs while the Sitemap updating.
- Now for the Error Email Sender option, select any of the following: General Contact, Sales representative, Customer support, Custom email.
- Finally, in the Error Email Sender option, select an email template to send the error notification.
Magento Sitemap: Step 3
Simply next, we’ll go through the Sitemap File Limits section.
For the option Maximum No of URLs Per File field, enter a real number of URLs per file. Here Note that the default limit is 50,000 for Magento Sitemap.
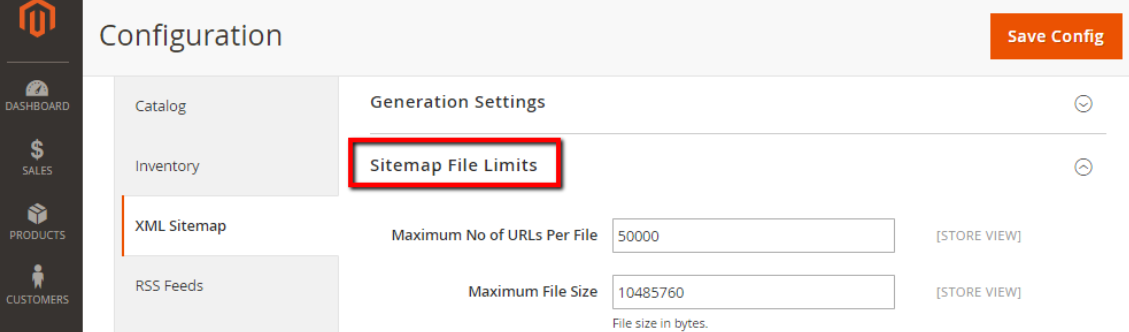
Next, in the Maximum File Size option, enter the max size of the file in bytes. Also Note, the default size is 10,485,760 bytes for Magento Sitemap.
Magento Sitemap: Step 4
Now go to the Search Engine Submission Settings option.
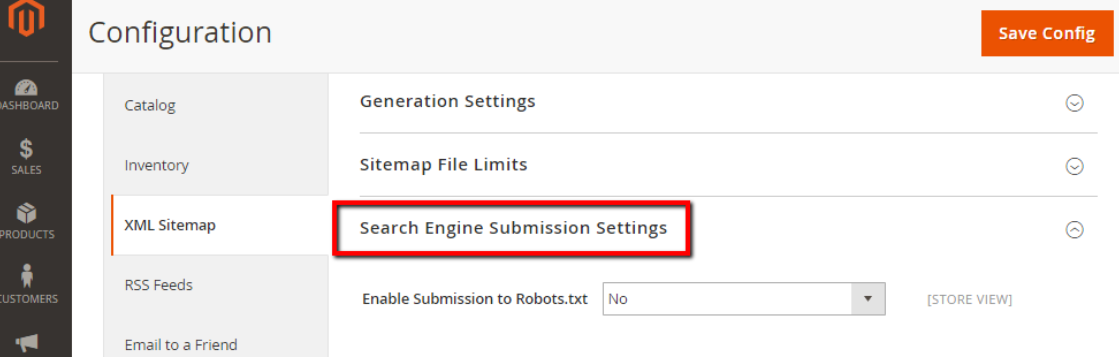
In the Enable Submission to Robots.txt option, select Yes. It’ll give access and information to search engines, For example, Google. So, the search engine will crawl your site by using a robots.txt file. After completing for saving changes, click Save Config.
We’re almost at the end of our article. Again, we’re recalling if you’re an Aspiration Hosting client just contact our support for adding Magento Sitemap in Search Engines. Either you can also read our next article. In the next article, we’ll show the process to verify Google, Bing, and Yahoo with your store. So that way they can crawl and index your site contents.