However it’s necessary for us to check the existing issue of WampServer. Before we install Magento on Wamp. So we’ll continue with the article, install Magento on Wamp. In the following steps we’ll test the WampServer and later configure it for Magento.
Buy our hosting plans to enjoy 28% OFF! till the holiday offer ends on 10th January 2018. We also offer a 30 day Money Back guarantee. However enjoy premium features like 24×365 tech support, performance audit and web development support absolutely free with hosting plans.
Tanzia Farin Chy – Aspiration Hosting
Install Magento on Wamp – Testing the WampServer
As we have already completed the installation of WampServer in our local PC. So, we’ll test now that the virtual server is working according same as our need.
1. First visit the link using any browser http://localhost/ .
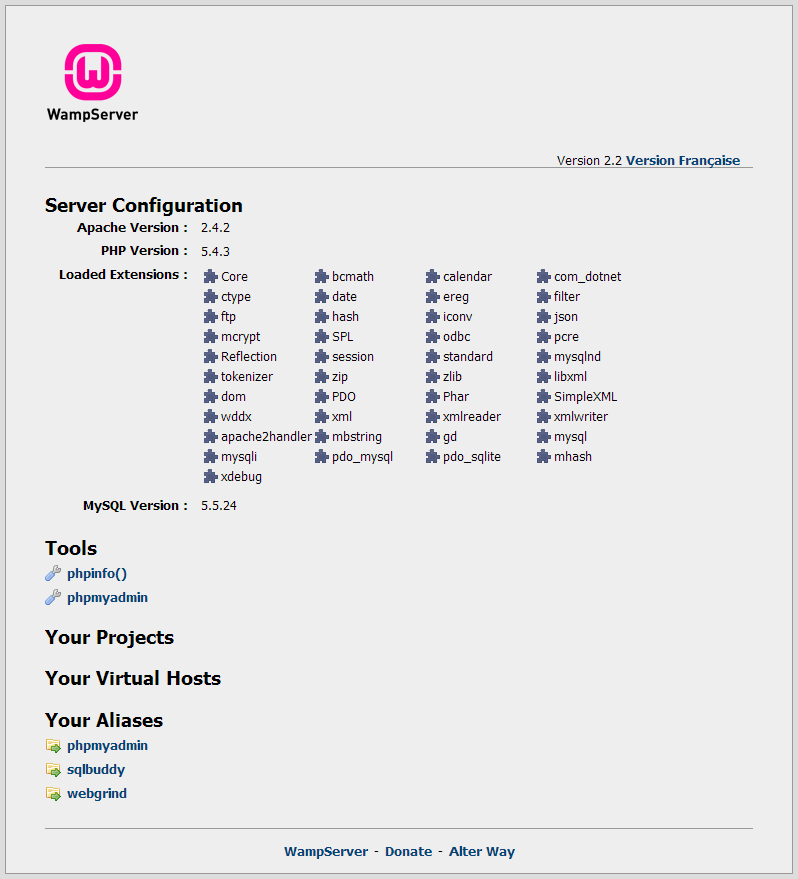
2. Now here we should see the homepage displayed by the WampServer.
Install Magento on Wamp – WampServer Homepage
In case, the WampServer homepage is not available. Here it means either we’re running any other application on port 80. Also we need to check our host file which needs to be assigned following IP 127.0.0.1. However applications like XAMPP, DesktopServer, Skype and WebDAV etc. might cause such issues.
Secondly we’ll check our phpMyAdmin by visiting the link http://localhost/phpmyadmin/ using suitable browser. In case we get can’t connect or invalid settings or such errors. For such case, we’ll need to configure C:\wamp\apps\phpmyadmin3.5.1\config.inc.php file by using some text editor for example: notepad++ etc. Make sure the following value is set to true to resolve the issue.
$cfg['Servers'][$i]['AllowNoPassword'] = true;

Install Magento on Wamp – Configuring WampServer
Here we’re almost done with testing and installation of WampServer. Next we need to configure few more settings to complete the local PC setup.
PHP Configuration
1. First go to WampServer by clicking the icon in the taskbar.
2. Second open php menu and press to open php.ini using any text editor. Now use following the settings to configure php.ini file.
- Setting up error reporting level: At begining of line eliminate the ; to enable error reporting.
error_reporting = E_ALL ^ E_DEPRECATED (~line 112)
- Configure Log PHP errors: At begining of line eliminate the ; to enable Log PHP errors.
error_log = "c:/wamp/logs/php_error.log" (~line 639)
- Change the value as following to increase Max size of POST data. As a result, PHP will accept these amount of POST data.
post_max_size = 50M (~line 734)
- Similarly change value to increase Max allowance size for uploading files.
upload_max_filesize = 50M (~line 886)
- Click “Save” to make changes permanent.