Welcome to our first Backend related article, Node js for beginners. Aspiration Hosting is always committed to sharing knowledge. Before we begin with today’s topic, let’s discuss a few general terms for a better understanding of Node.js.
Here check out our Node.js hosting solution for your network applications. With our Node.js hosting and server packages, we’re offering Aspiration Cloud, SSD storage and LiteSpeed web server to ensure high performance and scalability, absolutely free of any extra cost. Also, we’re providing node.js support for all of our clients comes with in the packages.
Node js for Beginners – What is BackEnd?
In contrast, with FrontEnd or client site a BackEnd indicates the server side of a web-based application. Basically, separation of concerns between FrontEnd the presentation layer and the BackEnd the data access layer for web-based application or software.
Node js for Beginners – What is Node.js?
Without prolonging the introduction, as per the Node.js official, Node.js is a javascript runtime based on the V8 JavaScript engine of Chrome.
However, there are hundreds of ways to download Node.js and setting up a work space. Also, for the same reason, we’ll need to install several applications to set our environment up and running. Furthermore, we need to use our terminal to initiate with the server. Don’t worry we’ll show you a great and simple way, to begin with Node.js in few simple clicks.
The following is a list of installations and tools we need to run our first “Hello world” code in Node.js:
- Installing NVM
- Download & Install Node.js
- Add Node.js versions
- Installing Node Package Manager (NPM)
- Package.json
- Setting up server etc.
Generally, we’ll need to combine many things to run our very first code with Node.js. Either we can use the latest technology such as Visual Studio to set up our fully functional workspace for Node.js. All we need to do is register for free with the Cloud9 and it’ll set up everything single thing we mentioned at the list.
Node js for Beginners – NVM setup for windows
To setup Node.js in a windows environment, we’ll begin with the Node Version Manager setup. Here is the installation file to setup NVM in a windows environment. Please read the documentation to setup NVM in a windows environment. Either you can see this video to setup NVM in a windows environment.
Note: If you already have any version of Node.js or NVM please uninstall both completely from the local machine. Even the folders using the following path:
C:\Users<user>\AppData\Roaming\npm
Node js for Beginners – How to download & install the Node.js?
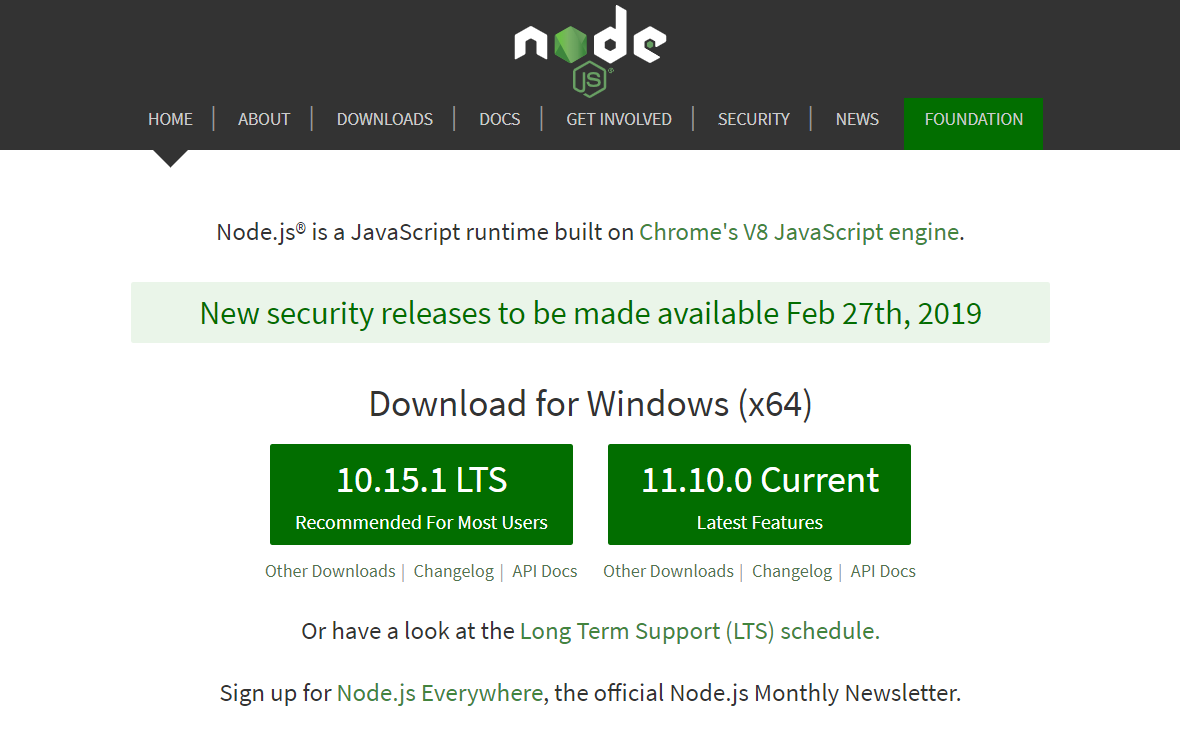
First, go to the official page of the Node.js.
Here we can see two different versions of the same:
- Recommended version (currently 10.15.1 LTS)
- The latest version (currently 11.10.0 Current)
- To begin with, we can simply download the recommended version either you can also download the latest one.
- Now Simply click one of them to download the Node.js setup file in Local machine.
- Next, to run the EXE file as an administrator. It’ll pop up an application to install Node.js in Local machine.
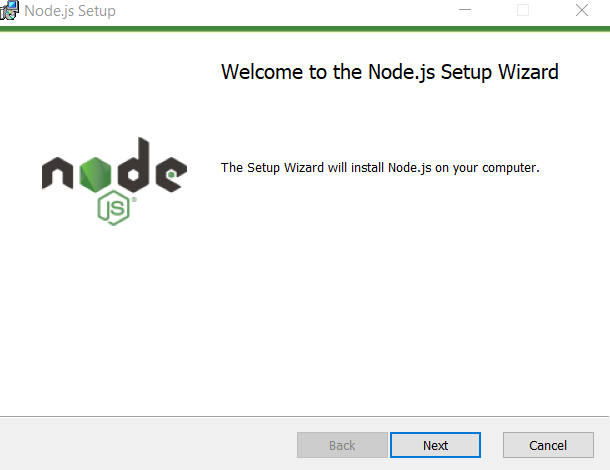
- Click Next, to begin with, and tick the square box to accept the End-user License Agreement.
- Now we can choose the destination folder to install Node.js manually. Or to set up in default location click Next again. Further, also click Next in the Custom Setup screen.
- Finally, click the Install button to begin installing.
- At the end click the End button to finish the Node.js setup. As simple as that, we have successfully completed the Node.js setup in our local machine.
- Restart the Machine to changes take effect.
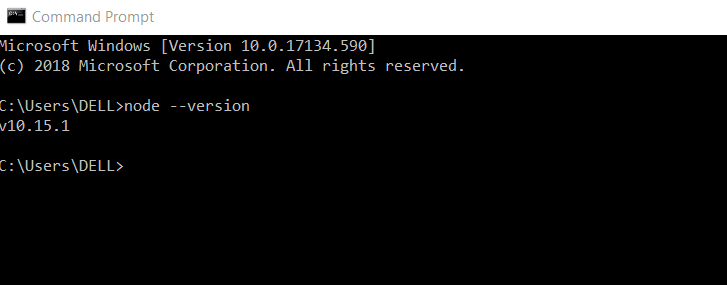
Before moving into the next part lets test the installation.
Go to the command prompt from start Menu of windows. Now, run the following code to test your node version:
node --version
Now you should see the following if everything goes right during installation:
Node js for Beginners – Adding different Node js version
We can now check the existing Node js version by using the following code:
nvm list available
For example, using the following codes you can add Node.js version 4.0
nvm use 4
Again for switching between version use the following commands:
nvm use 5
Checking the Node Package Manager
Here using the CMD run the following code to check the NPM version we are currently using:
npm --version
Node js for Beginners – Creating “Hello World”
Basically, there are 3 basic steps to run our first code with Node.js installation:
- Ensure the required modules.
- Next, create a server to listen to the client’s requests.
- Later by reading the request and return the response in browser or console.
Example:
First, we need to create a server.js file. Use the following code to create the file for testing purpose:
/*sample - server.js*/
//import modules
const http = require('http');
//import modules
const hostname = '127.0.0.1';
//import modules
const port = 3000;
//Creating Server
const server = http.createServer(function(req, res) {
  res.statusCode = 200;
  res.setHeader('Content-Type', 'text/plain');
  res.end('Hello World\n');
});
//Listen and Response
server.listen(port, hostname, function() {
  console.log('Server running at http://'+ hostname + ':' + port + '/');
});
Now run the server using CMD by typing the following code:
node server
Next, go to the URL: http://127.0.0.1:3000/ using URL to see the “Hello world”.
Node js for Beginners: Using Visual Studio Forget Everything Above
First, download and install the Microsoft Visual Studio 2017 or later versions. For installing open the VS installer .exe file with administrator permissions. Here remember to select the Node.js development workload before installing the VS. Here is a good example of setting Visual Studio including the Node.js development workload.
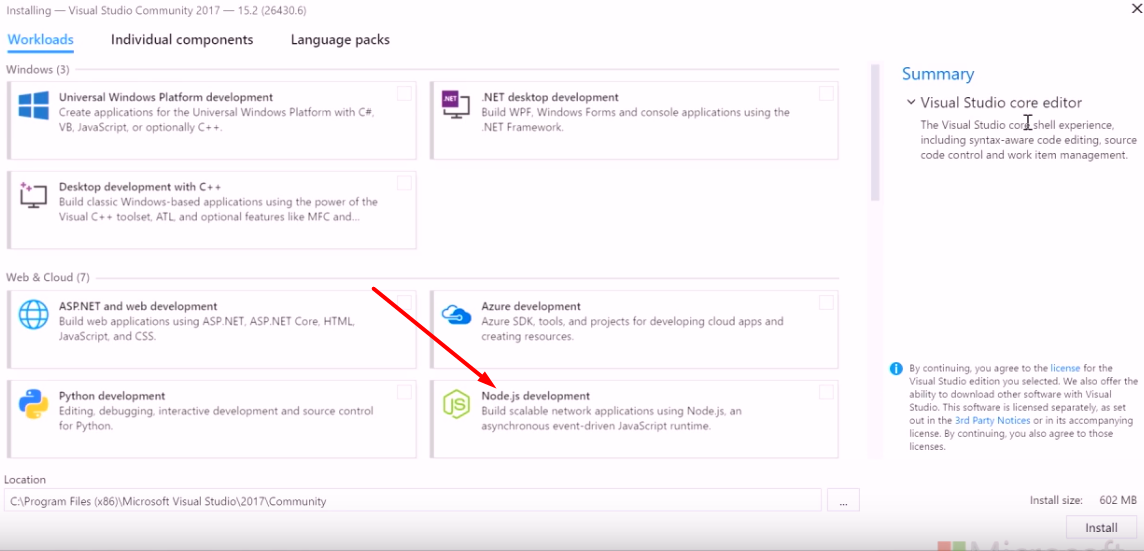
Also, the new visual studio includes Node.js development workload as default in all versions. Including the free community version for open source developers. So we don’t need to set up every single app separately or you can say Microsoft Visual Studio 2017 will provide the complete work space to run our very first program.
All we need to download and install the latest version of Node.js as we discussed earlier in the article. Nothing else no need to setup NVM or any other application or packages.
- At the very beginning open MS VS 2017. From File Create a project.
- Now the New Project dialog box, in the left pane, expand to see the JavaScript, navigate and choose Node.js. Inside of the middle pane, choose Blank Node.js Web application. Now Press on to create a new node.js project.
- In case there is no Blank Node.js Web application project template. First, click the Open Visual Studio Installerlink. To find the same check in the left pane of the New Project dialog box. Now, you can see the Visual Studio Installer has been launched. Next, choose the Node.js development workload, next choose Modify.
- As you have already selected the Blank Node.js Web Application template. Simply click OK. Generally, Visual Studio will automatically create a new solution and opens the project.
- Now create a new file and name it as server.js.
- Now we all have to do is to copy paste the above-mentioned example code inside the file server.js and save changes.
- Finally, Hold CTRL key + hit F5 in the keyboard and it’ll open a new browser tab automatically.
- In this browser screen, we should see the Hello world with the local port number.
In conclusion, even though it is simple to set up node.js. Basically, our target was to demonstrate the steps to set up a work space in Windows for using Node.js.