PayPal is a familiar payment platform used globally for making and receiving online payments. So, adding the WooCommerce PayPal checkout method adds payment versatility and value to an online store. As a result, both the customers and merchants can make and receive payment securely through PayPal checkout. Also, PayPal had wide coverage around the world. Approximately, 200+ countries around the world are using the PayPal payment method.
If you’re about to launch a new WooCommerce site, we’re providing best WooCommerce hosting at an affordable price. At Aspiration, you can enjoy premium features such as AspirationCDN, Litespeed cache, and secure the site with applications like Patchman, etc. Moreover, these premium features come absolutely free the Pro and Plus WoocCommerce Hosting plans.
WooCommerce PayPal Extension: PayPal Checkout
The PayPal Checkout is a free WordPress extension for integrating PayPal in WooCommerce.
WooCommerce PayPal Extension: Installing PayPal Checkout
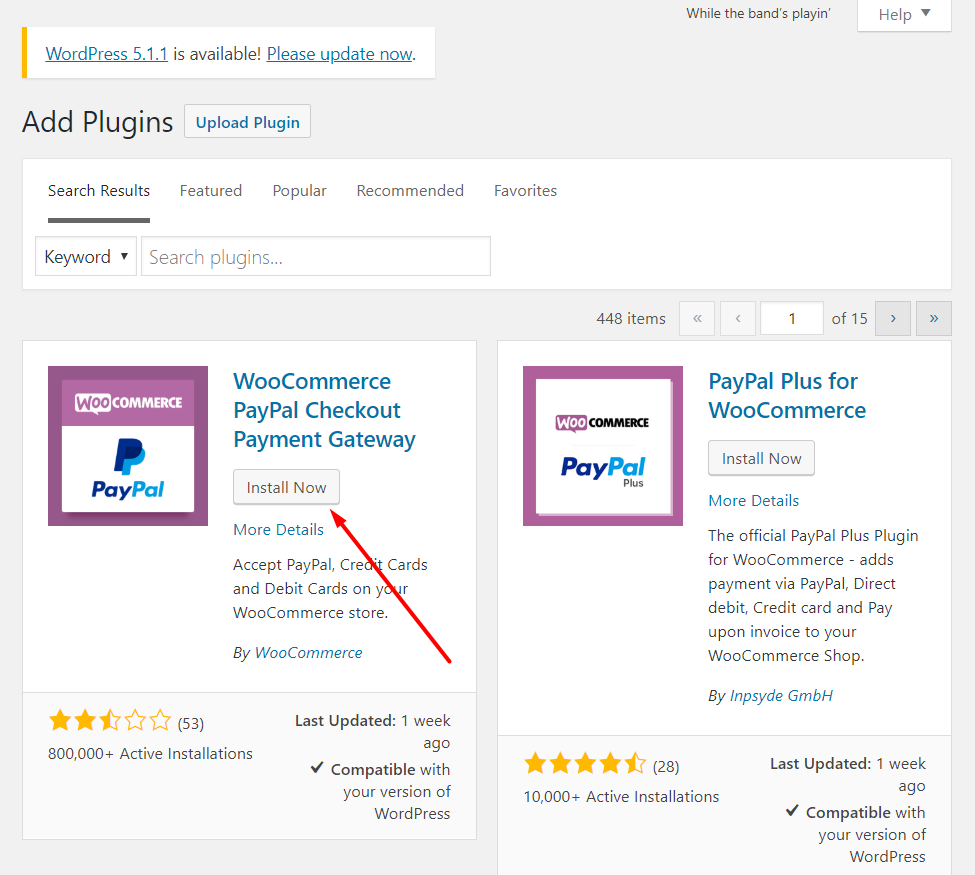
- To install the PayPal Checkout extension, log in to WordPress Dashboard using your credentials.
- Next, find Plugins under the left sidebar in WordPress Dashboard. Under the Plugins page, click Add New.
- Finally, click Install and Active the plugin as usual as we do for other extensions.
WooCommerce PayPal Extension: Setting up PayPal Checkout
Prerequisites:
- Firstly we’ll need a PayPal Business account. In case we don’t have one then create a new PayPal account by visiting PayPal official website.
- Generally, Woocommerce subscription poses builtin support for two Paypal Methods. 1. PayPal Standard and 2.Express Checkout. In the case where the merchants want to use PayPal Reference transactions, can directly contact the support for enabling the service.
Setting up the Extension:
- Under the WooCommerce Settings page go to Payments tab.
- Now, find the PayPal Checkout option and click to Enable the settings.
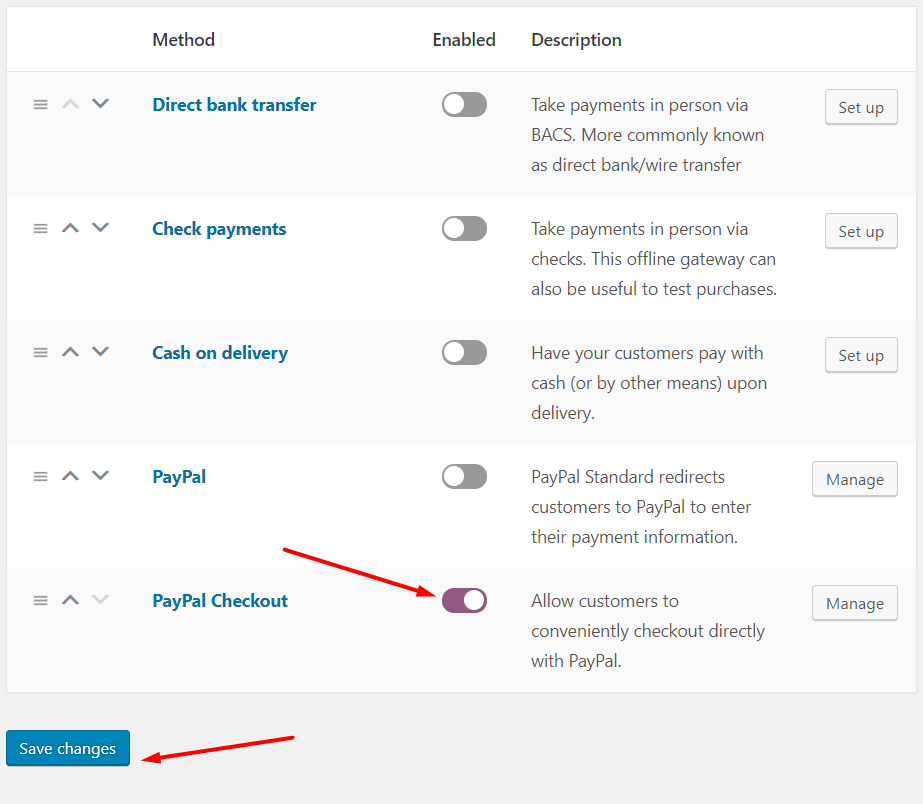
- Click on the Setup/Manage button to configure the extension to receive PayPal payments.
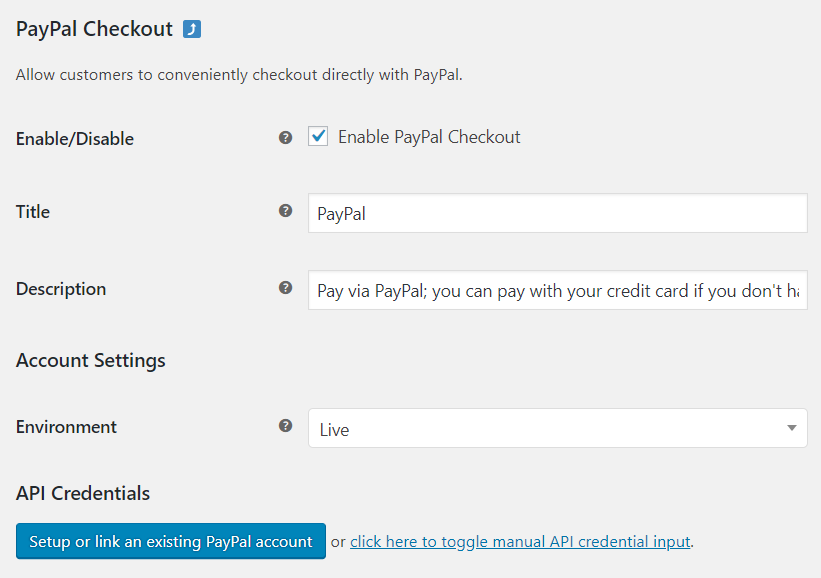
- Set the up above attributes in the image as following for using PayPal Checkout.
- Enable/Disable – Turns on and Turns off the extension for PayPal Checkout.
- Title – Method title to be displayed on the customer screen during Checkout. Name it as required.
- Description – Displays information about the Payment method during Checkout. You can use the default message or write a new customized message.
- Environment – Select Live to accept payments. Either Sandbox for test purpose.
Setting up the API:
Basically here we’ll connect our existing PayPal account with WooCommerce online store using the extension PayPal Checkout.
-
- To setup API, click the Setup or link an existing PayPal account button.
- By clicking the above button we’ll be redirected into a Paypal Signup or Login page. Now using your credentials login to the existing PayPal Account we have created for our store.
- In PayPal Dashboard, click on the My Selling Tools. Now by scrolling down find the API Access tab. Next click on update to display the credentials.

- Now Copy the credentials from the PayPal and paste into Woocommerce PayPal Checkout attribute fields. Exactly the Live API Username & the Password.
- Also, fill in the optional attribute that is the Live API signature. Again collect the data from PayPal and fill in the other attributes like LIve API Certificate and the Subject.
- Finally, click the Save Changes button to save the settings for the PayPal Checkout extension.
Another way – Setting up the PayPal-Hosted Checkout
There is another way you can host the check out process for the clients. In such a case, Paypal will host the checkout process. Basically, the customers will be redirected to the PayPal site during the checkout process. So, the customer feels safer and later will be returned to the main site.
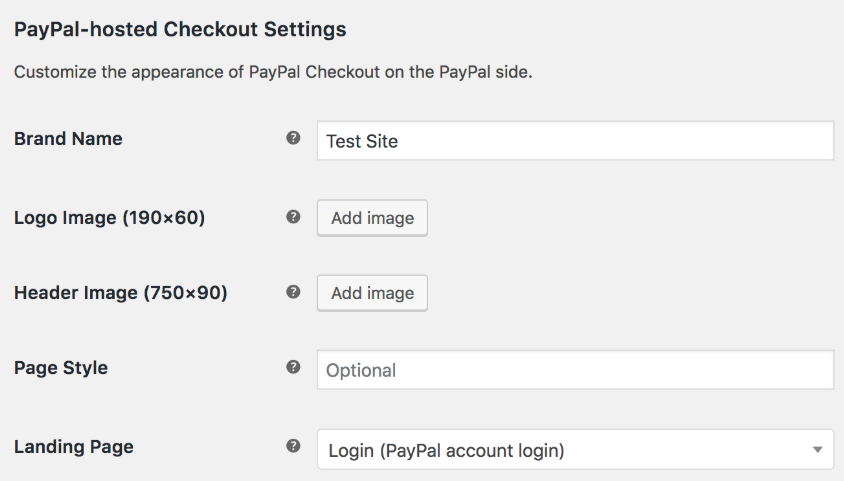
Scroll down the page to see the PayPal-hosted Checkout settings and make the following changes to the attributes:
- In the Brand Name attribute, give a name that will be displayed to the customer during the checkout process. Further, the customer will see the Brand Name in the PayPal site during the checkout.
- In Logo Image Attribute, add an image to display as a logo in the PayPal site. Similarly, we can also set up a Header Image. To add a new image for both header and logo, click the Add Image and upload the file from PC. Or we can use an existing image from the Media library.
- We can optionally set a Page Style as default in the Paypal site.
- An alike Landing page is the page customer will see at the very beginning of the checkout process.
Here note above settings will be shown to the clients in Paypal site after the redirection towards PayPal hosted checkout.
Advanced Settings
Again scroll down to see the Advanced settings attributes. Now make the following changes:
Enabling the Debug log will log every time the troubleshooting take place.
Next, the Invoice Prefix detach the online order for easy identification. For example, the default value of this particular attribute is WC_.
Further, two sections the Billing Addresses and Require Phone Number helps us to build a customer database. Later we can use this information database for marketing purpose or promotion.
In Payment Action attribute, select the Sale for capturing fund immediately. On another hand, Authorise only verify the fund availability. Later the merchant needs to claim the fund in a limited period of time.
Require Instant Payment ensures and force the customer to pay and capture the funds immediately.
Finally, the Subtotal Mismatch Behavior completes the transaction in a case where the subtotal differs between PayPal and Woocommerce.

Setting up the Button
- To make the site more responsive for the client tick beside the Use Smart Payment Button option.
- In Button Size attribute, we can select the button size to display.
- There are more settings available such as the Enable PayPal Credit(only for the customers inside the US), Enable PayPal Checkout on the cart page, and the Check out Single Product etc.
- Finally, select the Enable PayPal Mark in case if you want to show the PayPal name during the on-site Checkout process.
Thanks for being with Aspiration Hosting. Again, our pro and plus clients can directly contact support for setting up PayPal in their WooCommerce site.