Woocommerce Storefront is a free theme to design eCommerce websites in WordPress. Today we’ll show you the procedure to create an eCommerce site using Woocommerce Storefront theme.
In eCommerce industry bounce rate has a great impact on website performance. The lower the bounce rate means the clients are enjoying your user interface and spending more time in the shop. As a result, it has a proven fact the lesser the bounce rate means the higher the possibility of a sale.
Generally, people use more time in responsive user-friendly web sites. Futhermore, the hosting and database storage are the main subject of concerns regarding web performance of a site. So, for serving the best hosting experience, we’ve included SSD cloud-based storage and Aspiration CDN services to our hosting packages for fast and responsive user experience. Our pro and plus members can enjoy premium apps and features for web development such as Lite speed cache, free SSL and many more. So join us right now to enjoy a 30% discount on the first month bill.
Installing the Woocommerce Storefront theme
We can use the WordPress Dashboard to install WooCcommerce Storefront. Even this the fastest way to install Woocommerce Storefront.
Follow the following steps to install Storefront using WordPress:
- Firstly, login to WordPress Dashboard with admin credentials.
- Now go to Appearance. In the Appearance go, Themes>Add New to add Storefront.
- Likewise, we’ve added plugins use the search box and type “Storefront”. Now, hit Enter.
- Simply click the Install button to install the theme.
- Now from the Theme screen click the Active button to activate WooCommerce Storefront as the current theme.
Similarly, we can manually download and install the Storefront theme manually using FTP or cPanel.
Uploading the theme using FTP
Firstly, we have to download the theme from Woocommerce official theme site.
Now, upload the theme file(extracted) using the following path using FTP:
/wp-content/themes/ dir
Again activate the theme by going to Appearance > Themes.
Uploading Theme file using cPanel
Firstly, login to the cPanel using admin credentials for cPanel. At the top find the File section.
Follow these following step to upload the theme using Aspiration Hosting cPanel:

-
-
- Under the file section, find the File manager. Later, click File Manager to open the above screen.
- In this screen, go to the root file. Generally,
public_html. - Now, under the root file click wp-content file folder. On the same page, click on the Theme folder to upload the Woocommerce storefront.
- Later, upload the theme zip file using the Upload button on the top bar.
- Now, extract the theme file inside the cPanel.
- Finally, Login to WordPress Dashboard and activate the theme.
-
Customizing the Woocommerce Storefront theme
As we’ve already installed the theme using one of the above-mentioned methods. Now, it’s time to customize our site to replace the default Woocommerce Storefront theme’s frontend visuals.
We can complete the following setups by using the Woocommerce Storefront theme’s guided tour option. All we need to click next after completing each setup to make changes.
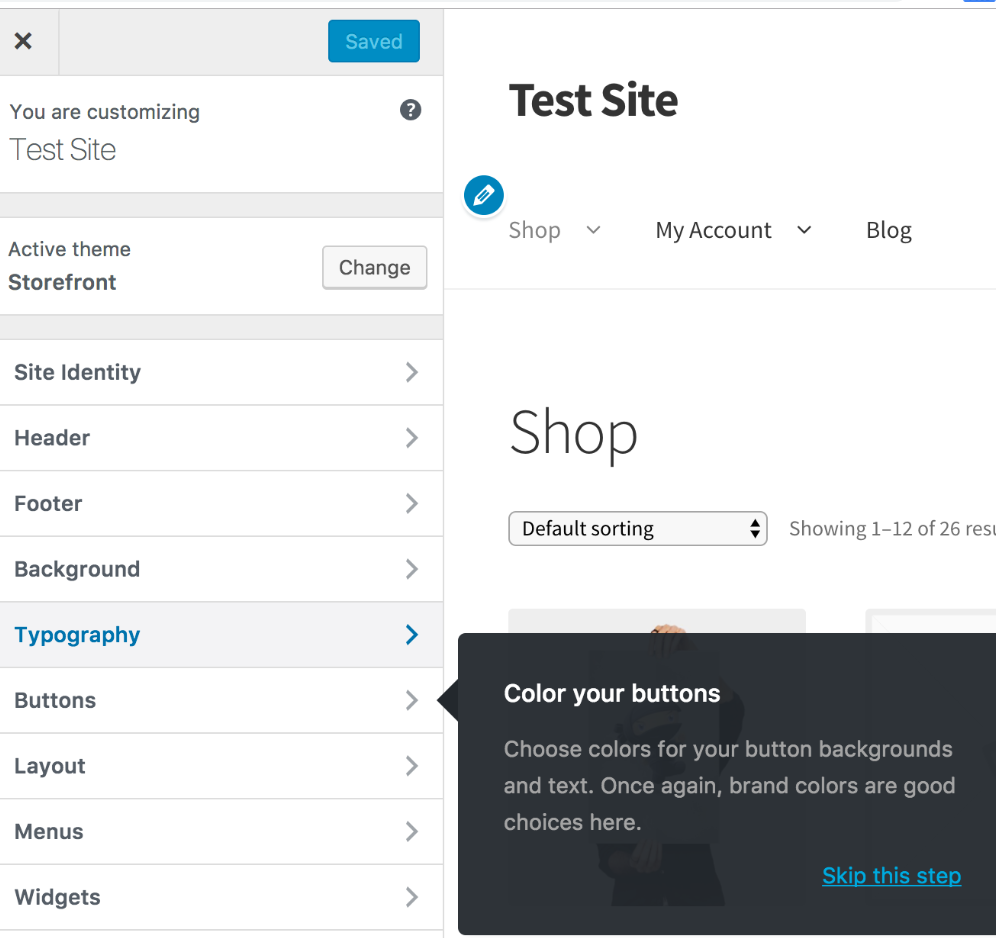
On the other hand, we can manually access the Customize sidebar from our WordPress Dashboard in the following way:
Customizing the Site identity
From Appearance on the left sidebar of the Dashboard, click Customize.
- It’ll redirect us to the front end of the website. Now on the left sidebar click on Site identity.
- In the beginning, under the Side Identity, change the SIte layout to full from the dropdown menu.
- Now by using the Login logo option, we can change our site logo. All we need to upload our desired logo and save the changes to replace the default logo. Later we can also change or remove the logo to add a new one.
- Now use the Site Title box to include a title to your site. Generally the name of the site.
- Beneath Site Title uses Tagline box to include a Tagline relevant of your service or type of site.
- Last but not least, here upload a 512 x 512 px size image to display just before the Site Title at the top of the browsing tab.
Customizing the Typography
Basically, under the Typography menu, one can change the site’s Heading, Text, and Link/accent color, etc.
The settings are more of visual and also can be kept as default Woocommerce Storefront theme.
Customizing the Buttons
Likewise Typography here we can use the default settings. This option includes great options such as Background, Text, Alternate button background, and Alternate button text color, etc.
Setting up the Product Page
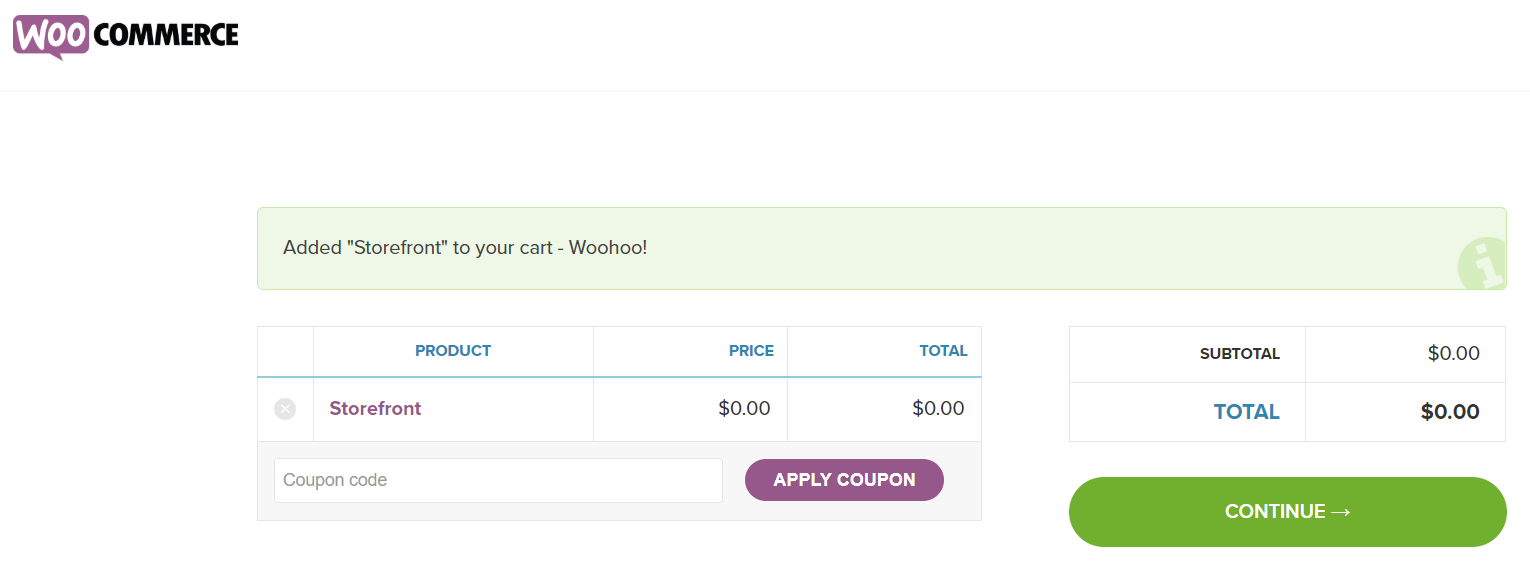
As we’re talking about eCommerce stores and working on Woocommerce Storefront theme, so product page is our one of the main concern. Because in these pages our customers will spend most of their time. At least we expect to improve our sales.
Firstly, select between enable and disable. To enable or disable the product page.
Here we can also activate the Sticky Add-To-Cart by clicking the checkbox. In the same way, we can add Product Pagination that gives the customer access to browsing between different product pages.
In conclusion, we here skipped many other settings which will definitely come handy for developing an eCommerce website using Woocommerce.