Today we’ll show exactly, How to install Magento using localhost (XAMPP)? Now we’ll show precisely to install Magento in windows environment. As we already have few detailed articles on Magento Installation process. So, we’ll here make sure that by following this article anyone can install Magento in less than 10 mins with accuracy. In a word, this is kind of article which will mostly help the brginners in Magento 2x.
Hence Aspiration clients can develop faster like local environment using our dedicated Mage Hosting plans. As we feature SSD cloud storage, Aspiration CDN, LiteMageCache and other premium features absolutely free with hosting plans. Now enjoy our hosting only for $9.99 per month. Tanzia Farin Chy for Aspiration Hosting!!!
Install Magento in Windows – Download Magento 2.x
As we all know that Magento is an easy to use free platform. And widely used around the world now a days for online store purposes. So, visit the following Mage download page to download latest Magento software in .zip, .rar or any other suitable format.
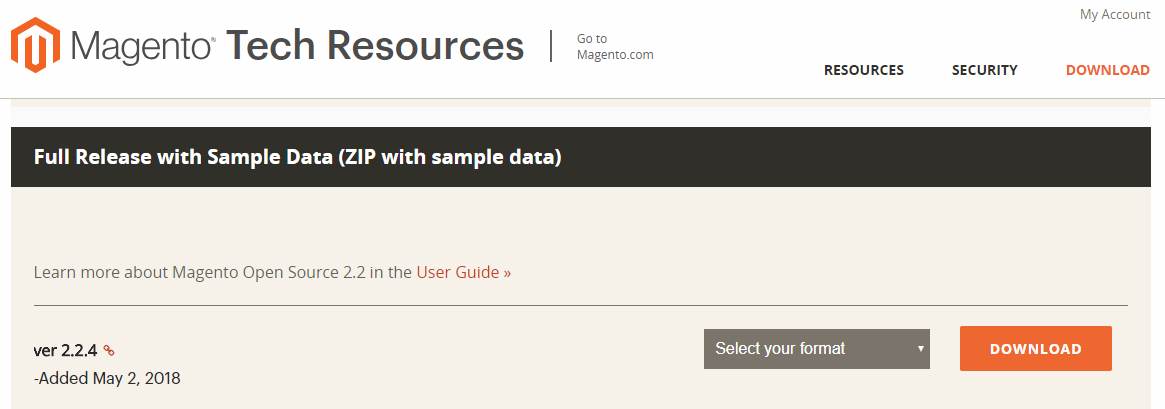
Simply download the file and save it in local folder in to your PC.
Install Magento in Windows – Download Xampp & Install

Simply follow the link to XAMPP download page. Here download the XAMPP file and install XAMPP in few simple steps . After installing XAMPP open the “XAMPP control panel” using the search bar of Windows 10 OS. However, the control panel looks similar like the following:
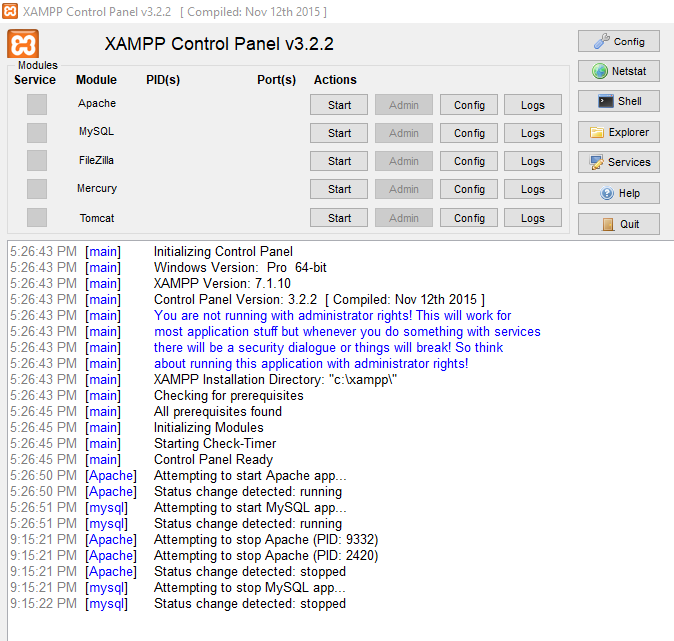
Now clicking on the button beside the Apache & MySQL button will result by making our PC as localhost server. Here remember MySQL is basically acts like a local Database where we’ll save our Magento database.
Install Magento in Windows – Installing Magento
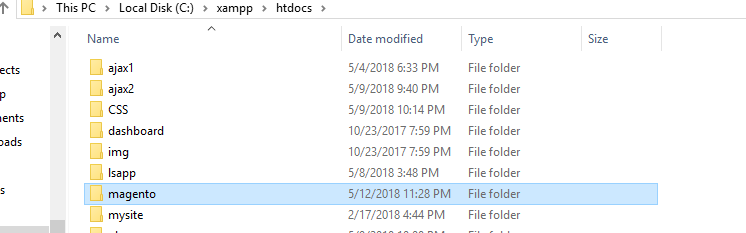
Now simply follow the path to reach XAMPP >> hotdocs. Here the path is following:
C:\xampp\htdocs
Next copy entire Magento 2x folder (.zip) in to xampp >> htdocs folder. Now extract the Magento using any software like winzip or winrar etc.
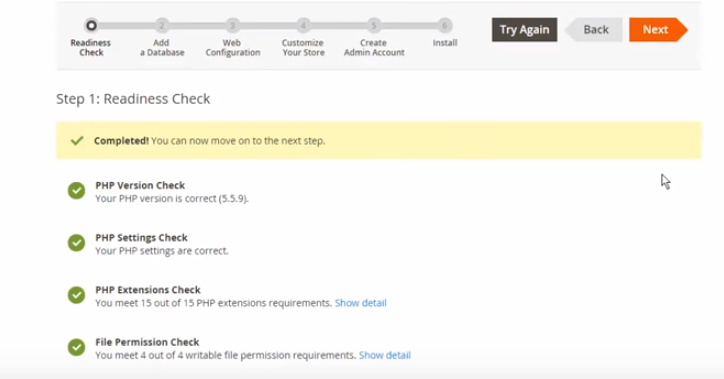
Now simply using your local browser type in localhost/magento/setup press enter. Next click on button.
Hence it’ll simply run the setup file for Magento press to complete the with Readiness Check . If everything goes right and there is no error occurred we’ll see something like following:
Install Magento in Windows – Creating DB phpMyAdmin
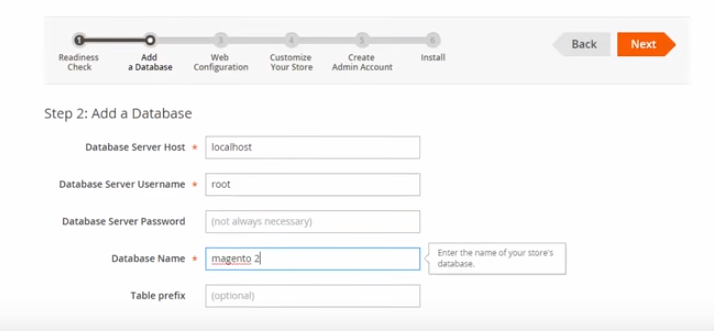
Next we’ll add a database. For creating DB using your browser type the following:
http://localhost/phpmyadmin/
So, under the databases tab type in the name of your Database and it can be anything you like simply click button to create a new DB.
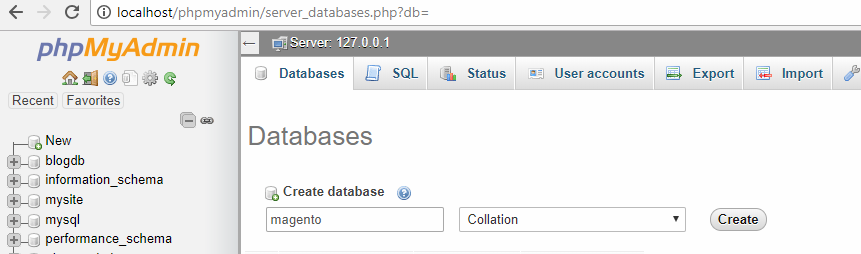
All done!! Now change the database name as “magento”. As we already chose the name for our database.
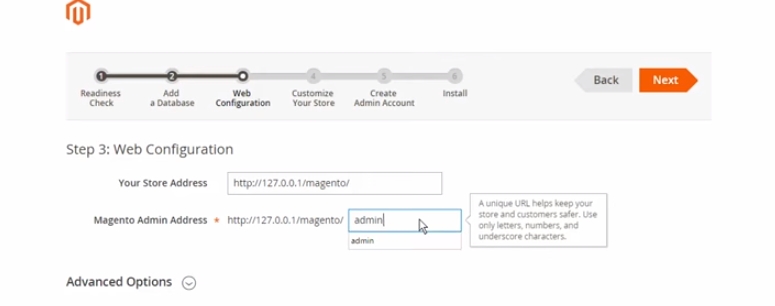
Next to go to the web configuration section click Next. Here simply make changes as following image and again click next:
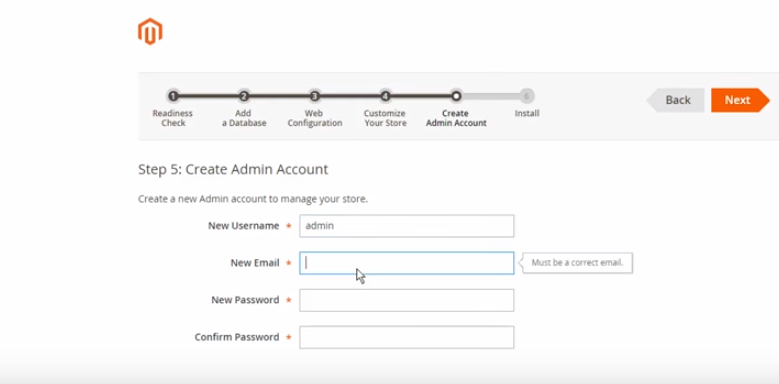
On the next step choose options to setup your store timezone, currency etc. and click next to continue. Now the following step is very vital, here we’ll setup our username and password. However, don’t forget the credentials. As we’ll need them each time we want login Magento Dashboard.
Finally click next and we can see now the installation bar. So, wait until it reaches to 100% and show the following screen with links and other details of installation:
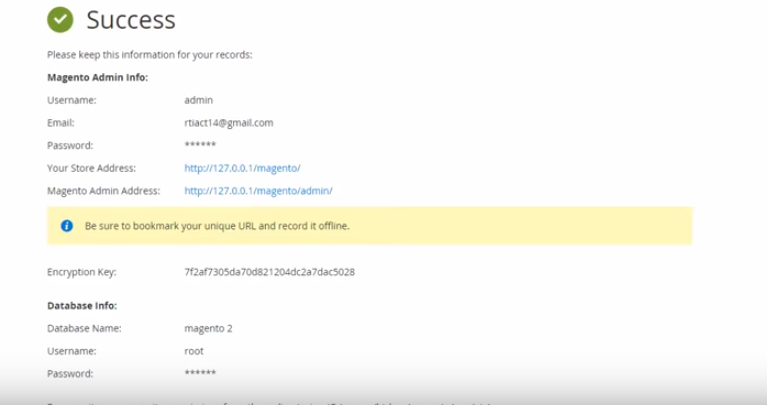
Now we can see our store frontend from our local browser using : http://127.0.0.1/magento/
Also we can visit the admin login page(Dashboard) using: https://127.0.0.1/magento/admin/
However, note: must use the same user credentials to login to Magento Dashboard.
Here we’re requesting you to read the next part “after installation part” of the article to properly edit or build Magento locally. So Thanks till then !!!!
Now reading Part 01 | Part 02