LocalHost Magento requires the following extensions to install Mage correctly in a localhost server.
Firstly download and install EasyPHP DevServer(latest ver). Furthermore, it also includes Apache 2.4.17, PHP v7.0.1, PhpMyAdmin v4.5.2 and MySql v5.7.9 etc.
Secondly, we need to make sure that php.ini & php.exe paths are set to Environment variable.
Finally, we need to download and install composer. Also, Mage needs composer for the dependency management. Similarly, composer provides an extra edge to Mage to manage Mage components and the dependencies. Here we can download composer.
Although the EasyPHP DevServer is used due to the requirements of Mage 2. The following are the Mage 2 official system requirements.
Web servers for localhost Magento
Apache 2.4 or 2.2. Please note: the module “apache mod_rewrite” must be on as it provides the web server to carry out the URL rewriting.
OR
nginx 1.8 or should be any mainline latest version. Hereafter, MySQL 5.6.x or MySQL 5.7.x are recommended as database.
PHP versions & localhost Magento
PHP 5.6.x & 7.0.x both are supported Mage 2. On the other hand, 5.5.x for Mage 1.9 version. Mage does not support PHP 5.4.x anymore.
Mage 2 needs a few extensions for PHP7 to install Mage in your localhost. Then also make sure EasyPHP DevServer has the following extensions for PHP7.
- pdo_mysql
- mbstring
- mcrypt
- mhash
- SimpleXML
- curl
- xsl
- gd
- imagick or ImageMagick 6.3.7 or latest
- soap
- intl
- bcmath
- openssl
Please find our article on system requirements. Alternatively, you can also visit the official site for Mage system requirements.
Here are the steps to install Magento localhost
First start with downloading your desired Mage version zip file.
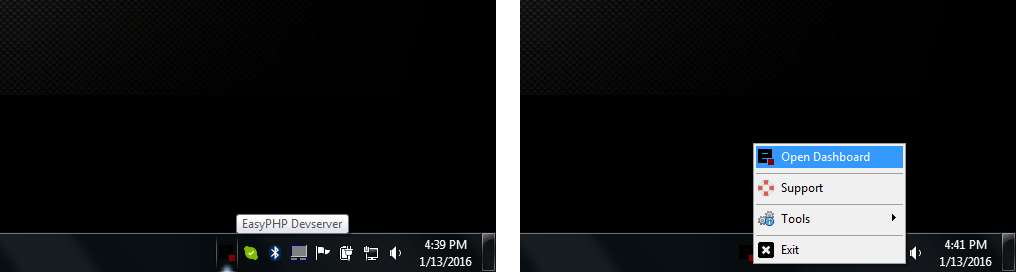
Next open EasyPHP DevServer. Now in EasyPHP DevServer taskbar icon press right click. Then click on Dashboard to open.
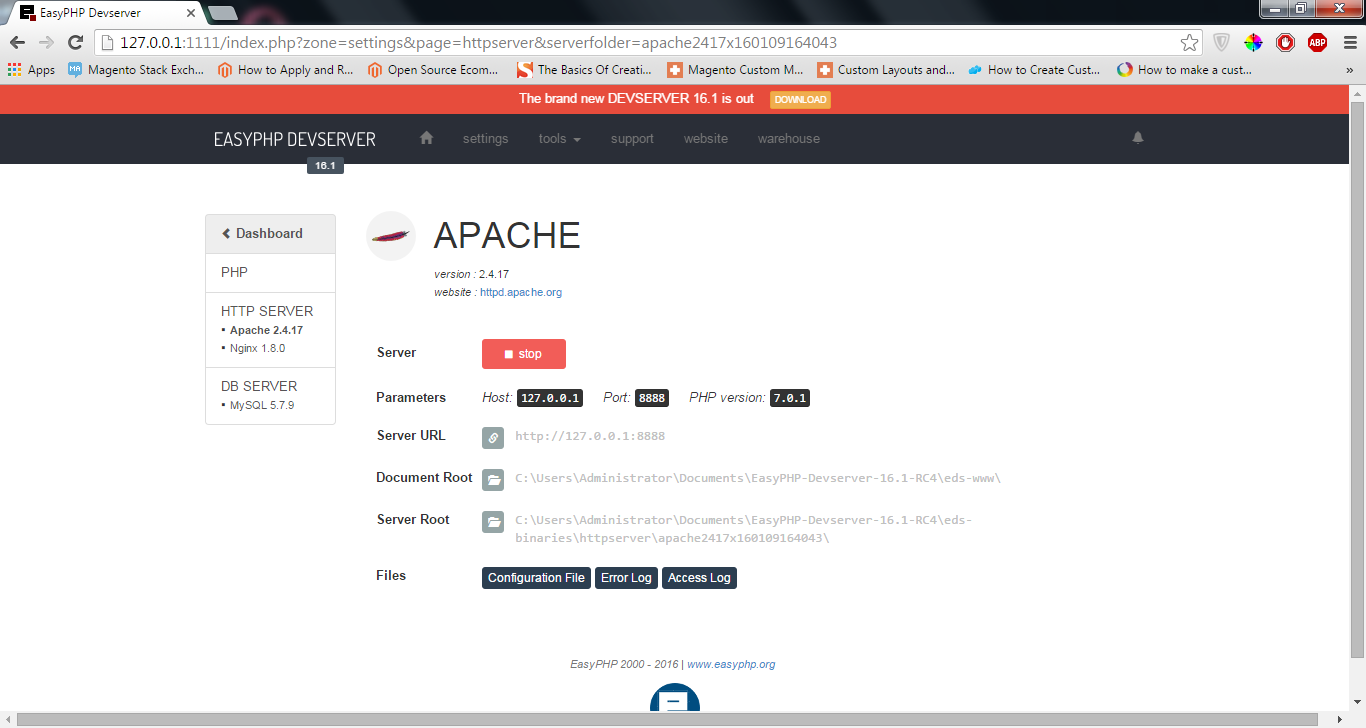
Hereafter press start icon under HTTP Server in Dashboard. Now select Apache as Server. Then select PHP v7.0.1 and Port 8888 as parameters. Finally click the start button to start the server.
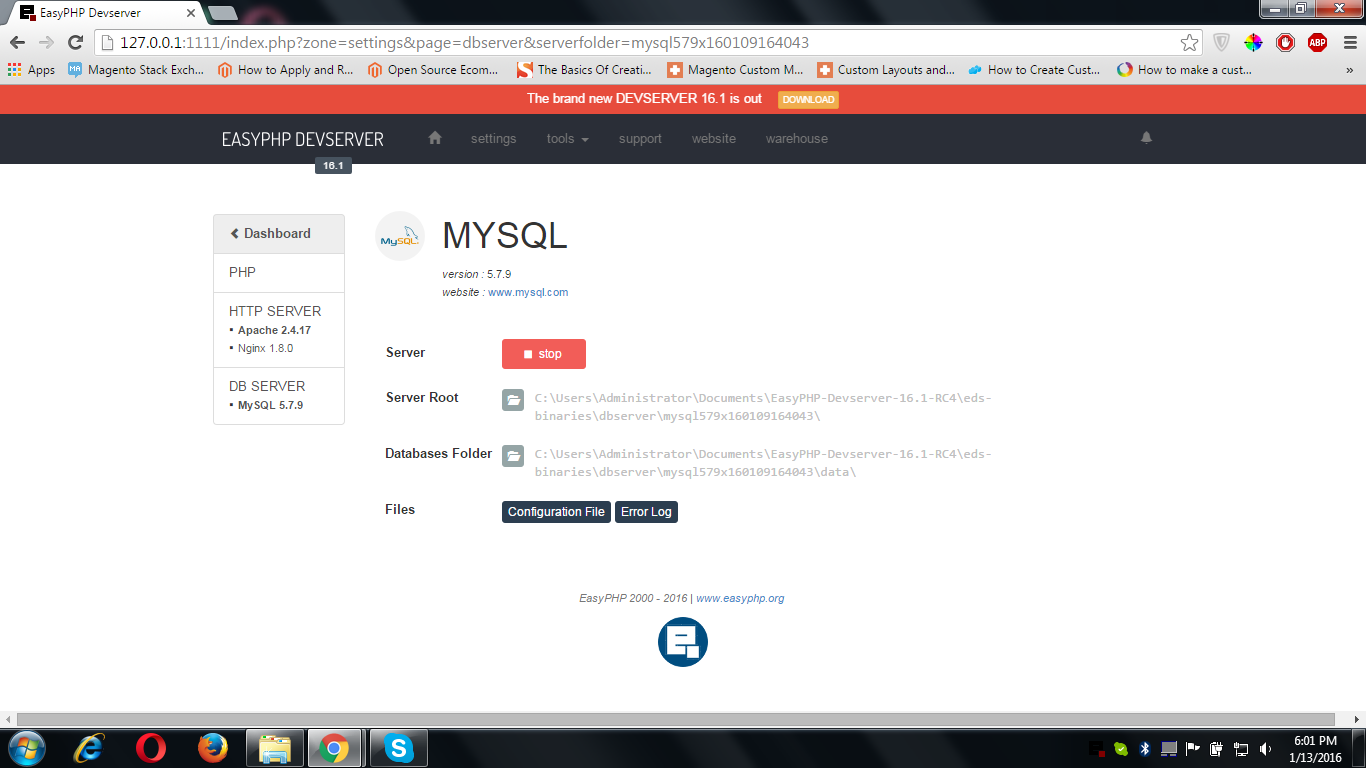
Next go back to the Dashboard. Under DATABASE Server click the start button. Then select MySQL as your Server. Finally, click the start button.
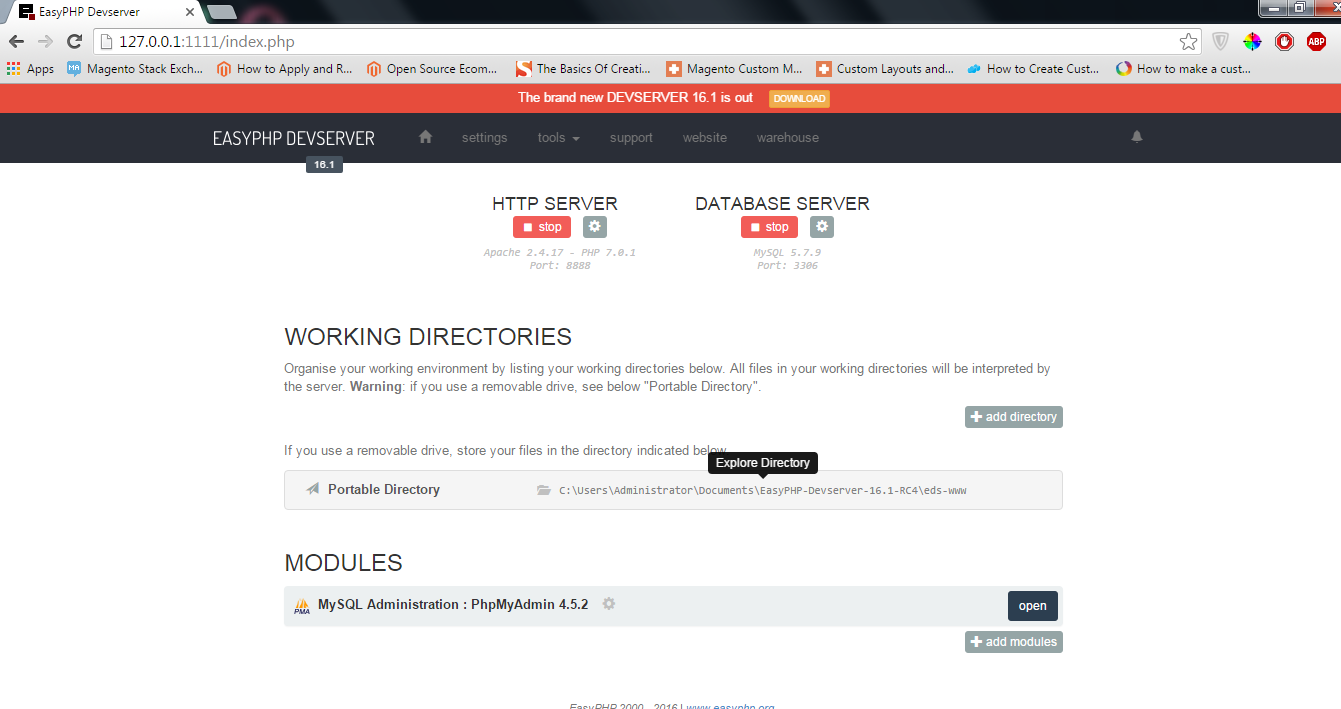
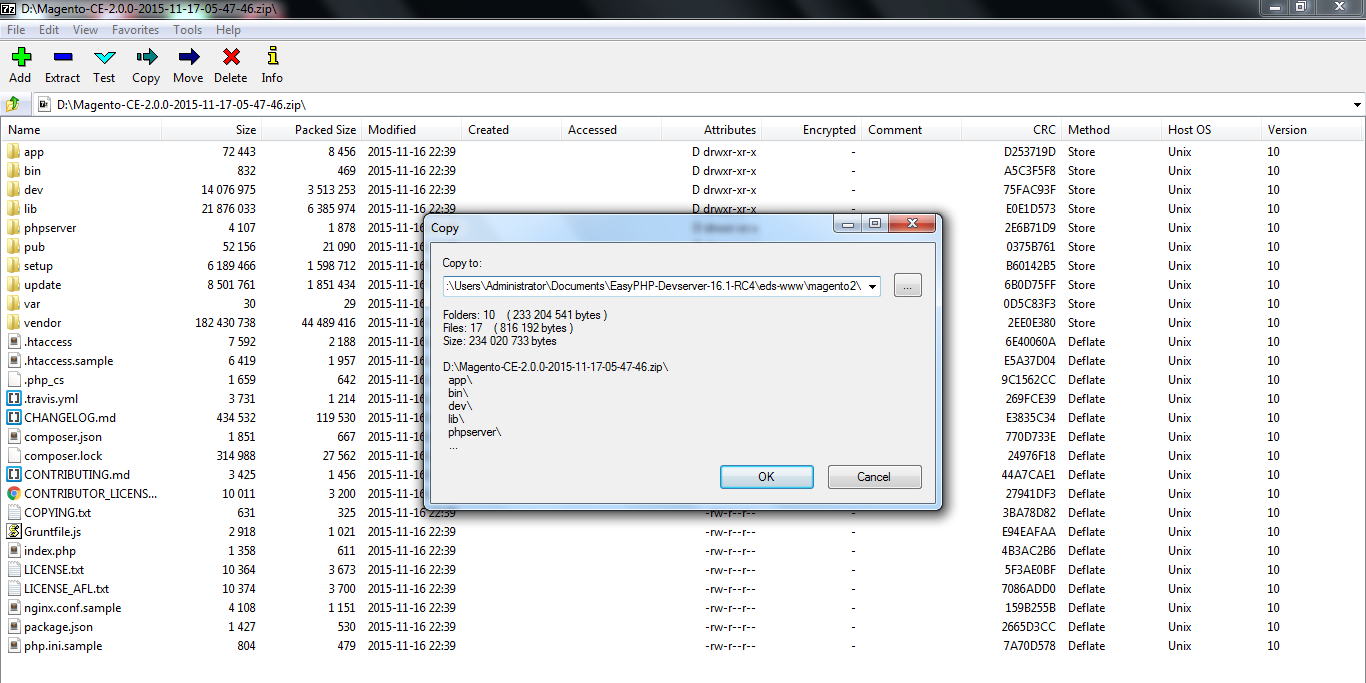
Next open Portable Directory source to browse the directory in the dashboard. Then we have to unzip Mage files using winrar or other software. The Directory of your local server is called the ROOT dir.
Create a Mage folder under ROOT dir. Then use winrar to unzip all files and folders from the Mage zip file.
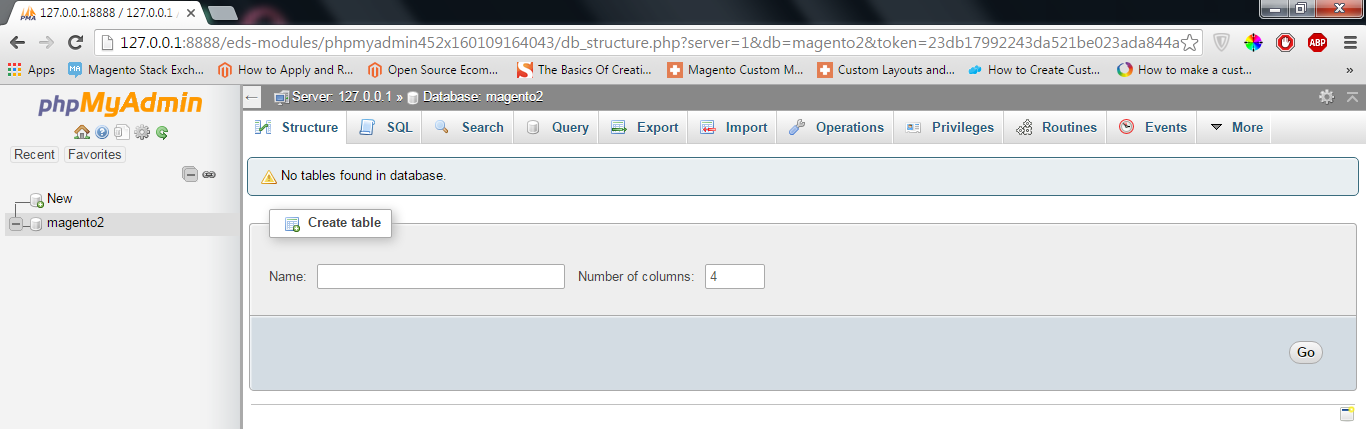
Now return to Dashboard of your EasyPHP DevServer. Hence start PhpMyAdmin from Dashboard.Now create new database and name it “magento”.
Finally, we are ready to install localhost Magento installation. Next access your Mage setup. Then input your Mage URL http://127.0.0.1:8888/magento2/ in search bar of browser and press enter. It will load the Mage setup page. Hereafter we will check the Agree and Accept to start setup.
