Here we’ll continue the 2nd part of the “Installing Mage extensions” article using FTP. Now we’ll go through the extension or module files using FTP. For doing the same we need have Magento FTP access. Generally you can manually add an FTP account using your cPanel. In case you don’t have Magento FTP access credentials. If so ask your Hosting provider for help or the coder who made the Magento setup in your domain.
Our hosting provides 24×7 customer support online to develop clean Magento sites. Further you can also enjoy our “One Click Installer” to easily setup Mage with ftp accounts & emails. All over that these premium features come absolutely free with our hosting plans. So, feel free to contact us for support and information.
Magento FTP access – Setup
1. Host – For example: ftp.myecommerce.com/
2. Username – For example: admin
3. Password – For example: xyz123
4. Port – For example: 21 or may be any
2. Username – For example: admin
3. Password – For example: xyz123
4. Port – For example: 21 or may be any
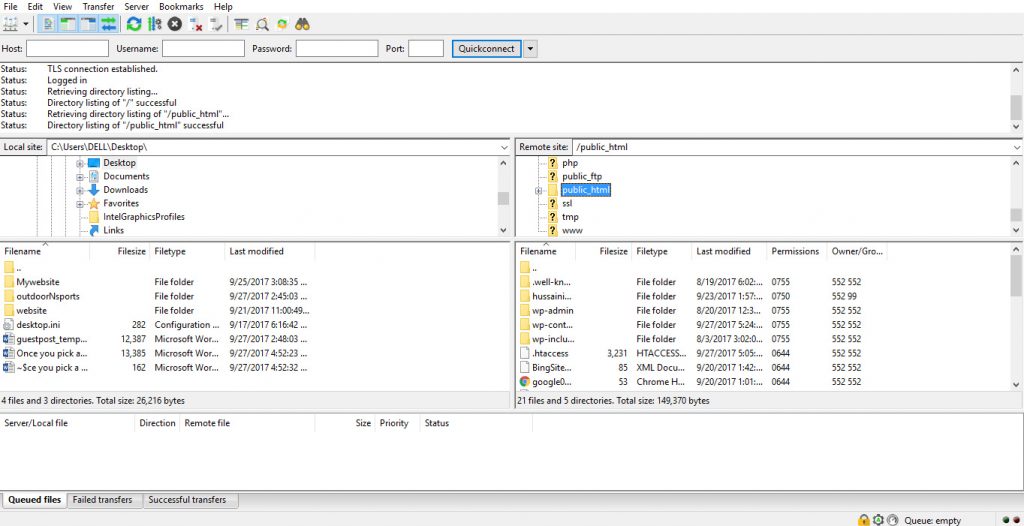
Magento FTP access – Introduction with Filezilla
So, put on the details and wait till connection gets established with the hosting server. On the Right top box we’ll see the Root folders. Further double click to open the any of them. Now see the subfolders under the Right bottom box.
Similarly on the left, the upper left box displays all root folders of local server or PC. By clicking the root folders we can access to the subfolders.
We can easily upload or download files and folders from or into either Local PC or hosting server. Just we need to drag and drop files and folders to upload or download. Later we can also the see queued files and folders for uploading from PC. Similarly check the status fro downloading from server to PC.
So, we’re done with setting up Filezilla. Now we have a basic knowledge over FileZilla operation. Later in the final part of the same heading article we’ll learn to upload the extensions or modules using Filezilla.