Here we’ll discuss the post steps after completing Magento XAMPP installation. As these steps are necessary to properly setup Magento in to a local environment using XAMPP.
However our it is always hard to find for a aspiration client that they’re working on live environment. Or in local environment like xampp. Because of our Ultra SSD storage and CDN services. So, enjoy a faster upload and development environment. Also enjoy free domain and transfer and web development services absolutely free with our Mage plus and pro packages.
For Aspiration Hosting Tanzia Farin Chy
Magento xampp installation – Login to Dashboard
Right after we did the install for Magento 2x into our local server using Xampp, click on the following to open Admin page and storefront:
https://127.0.0.1/magento/admin/
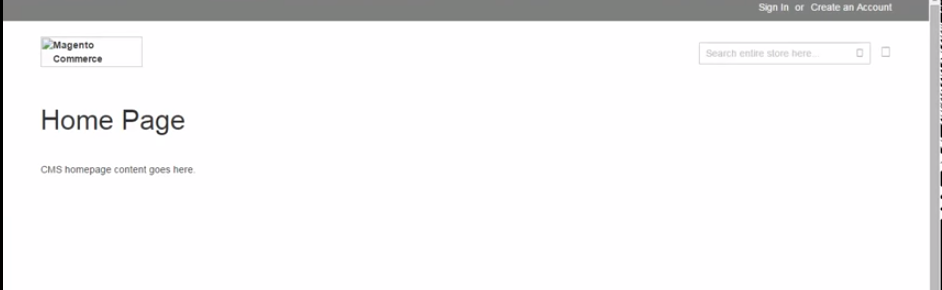
As a result now we can see the frontend of our Magento site in a browsing tab like the above mentioned image. On the other tab, we can see the admin login area for Magento like following image:
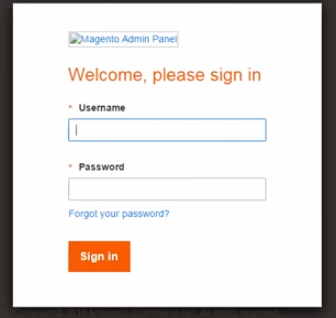
So remember here we need to enter the login username and password we’ve created in earlier in the first part of the article.
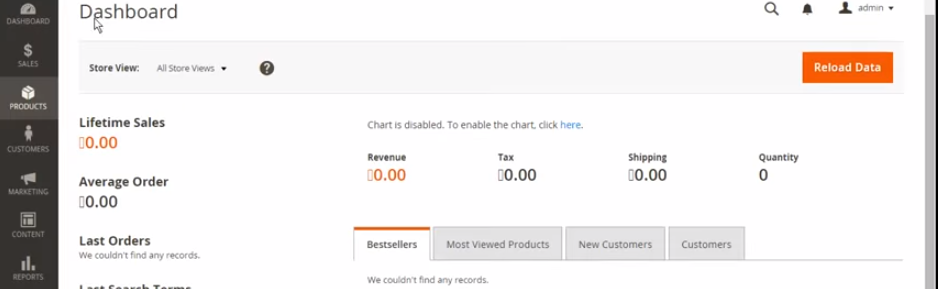
Simply entering the credentials we’ll hit the sign in button. And finally we can a screen like following image is basically our site Dashboard.

Magento xampp installation – Issues
Suddenly we’ll face a issue. As we give a close look to the earlier steps we can see that in the Dashboard the left side bar showing some options. But clicking on them are resulting no actions. Likewise, we saw the storefornt earlier but there is no Magento logo and looks like some broken page. So for solving issues like these follow the following steps instead:
First go to the following path: C:\xampp\htdocs\magento\pub\static .
Then simply delete all files except .htaccess inside the static folder.
Secondly we need to go to the following path: C:\xampp\htdocs\magento\app\etc .
Here we’ll see a file named as di. Now we’ll simply open that file using favorite text editor. For example: SublimeText or Notepad++ etc.
Now simply find the line no 574. But it may differ in some other version of Magento. So find the line as per the following image. And you can see at the end of line 574 it is written Symlink.
Just replace the word Symlink with the word copy. One more thing must do open the file with admin rights and as you’ve done the editing save the file now.

Now we’ll go back and refresh the Dashboard tab we’ve opened earlier. And similarly refresh the homepage (storefront).
Now click on the product tab on the left sidebar. And we can see that the issue get solved. As result we can see the product options in our DashBoard like following image:
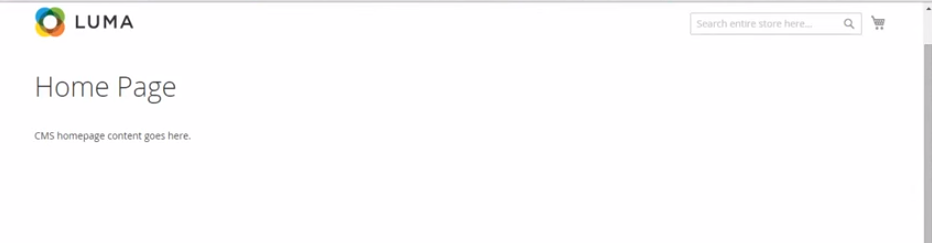
And also notice that the dashboard is working like product tab click on other tabs to make sure the functionality. So, Now go to the homepage tab (storefront) and similarly we can see the logo of default Mage theme. And the site also looks responsive than earlier as the following image:
So we reach the end of our article and successfully installed the Magento on local server (xampp) in the windows enviroment. So, good bye for now!!!
Now reading Part 02 | Part 01