As the process is bit longer here is the 3rd part of the article “Installing Magento Patch using SSH”. Here we’ll discuss the process of creating a back up for the Mage folder. So, in case of any data loss we can restore our Mage folder from back up. By the way Learn more about Magento patch list over here.
Create Back Up step by step:
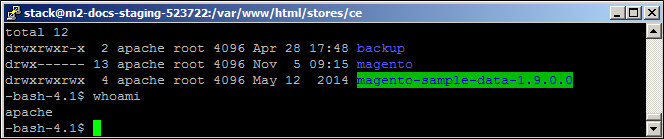
First we’ll use the Change Directory command. Here the 2 dots following the command will move one level up in DIR tree. Next list DIR to see the Mage folder.
cd ..
ls -l
Secondly we’ll create the new folder and name it as “backup” using the following command.
mkdir backup
ls -l
Again in case of “Permission denied” message, add Sudo in front of the Make DIR CMD. Now, list DIR to check the newly created folder.
sudo mkdir backup
sudo ls -l
Hence remember the backup folder needs to have the default owner and group as the Mage folder. Either we can use the following CMD to change the ownership of entire back folder.
Here in following CMD backup folder is designated to the Apache user and Root group by 1 dot. Again use “Sudo” in case you need admin access.
chown -hR apache:root backup .
ls -l
Now check the correct owner using CMD “who am I” as described below:
whoami
In next step, enter the following CMD to log in as an Apache user. After a while a new screen prompt. So, enter the password of Apache user account.
su - apache
Note: The prompt will change. So we’re now in the bash folder of Apache user. As we’re logged in as Apache we don’t need to use “Sudo” here.
By using Change DIR CMD return to main location of Mage backup folder. Now check both “where you’re?” and “who you’re?” by listing DIR.
cd /var/www/html/stores/ce
ls -l
whoami
In this step using following CMD copy the Mage contents into backup folder.
cp -r magento/* backup
After completing the copying process and it will return the system prompt. Next verify the contents of back up folder to ensure the copy process was successful.
cd backup
ls -l
cd ..
Restoring Mage permissions – Magento Patch list:
Finally, here we’ll restore the original file permissions for Mage folder. So use the following CMD to restore default permissions for Mage Folder. Now list the DIR to verify the permissions are restored.
ls -l

cd magento

find . -type d -exec chmod 500 {} \;

find . -type f -exec chmod 400 {} \;

find var/ -type f -exec chmod 600 {} \;

find media/ -type f -exec chmod 600 {} \;

find var/ -type d -exec chmod 700 {} \;

find media/ -type d -exec chmod 700 {} \;

ls -l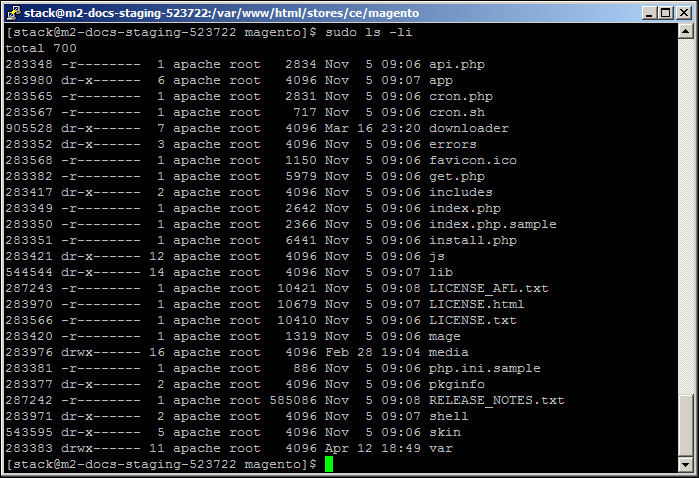
Here learn more about Magento Patch list.
Currently Viewing Part 3 | Go to – Part 01 | Part 2 |Part 3| Part 4 |Part 5| Part 6